> ## Documentation Index
> Fetch the complete documentation index at: https://docs.qwairy.co/llms.txt
> Use this file to discover all available pages before exploring further.
# Brand Settings
> Add a brand and configure workspace-level tracking settings: competitor auto-detection and page scope.
## Add a Brand
### Step-by-Step Guide
#### 1. Open the Brand Selector
At the top-left of your dashboard, click the dropdown under your workspace name (e.g. **Acme Inc**).
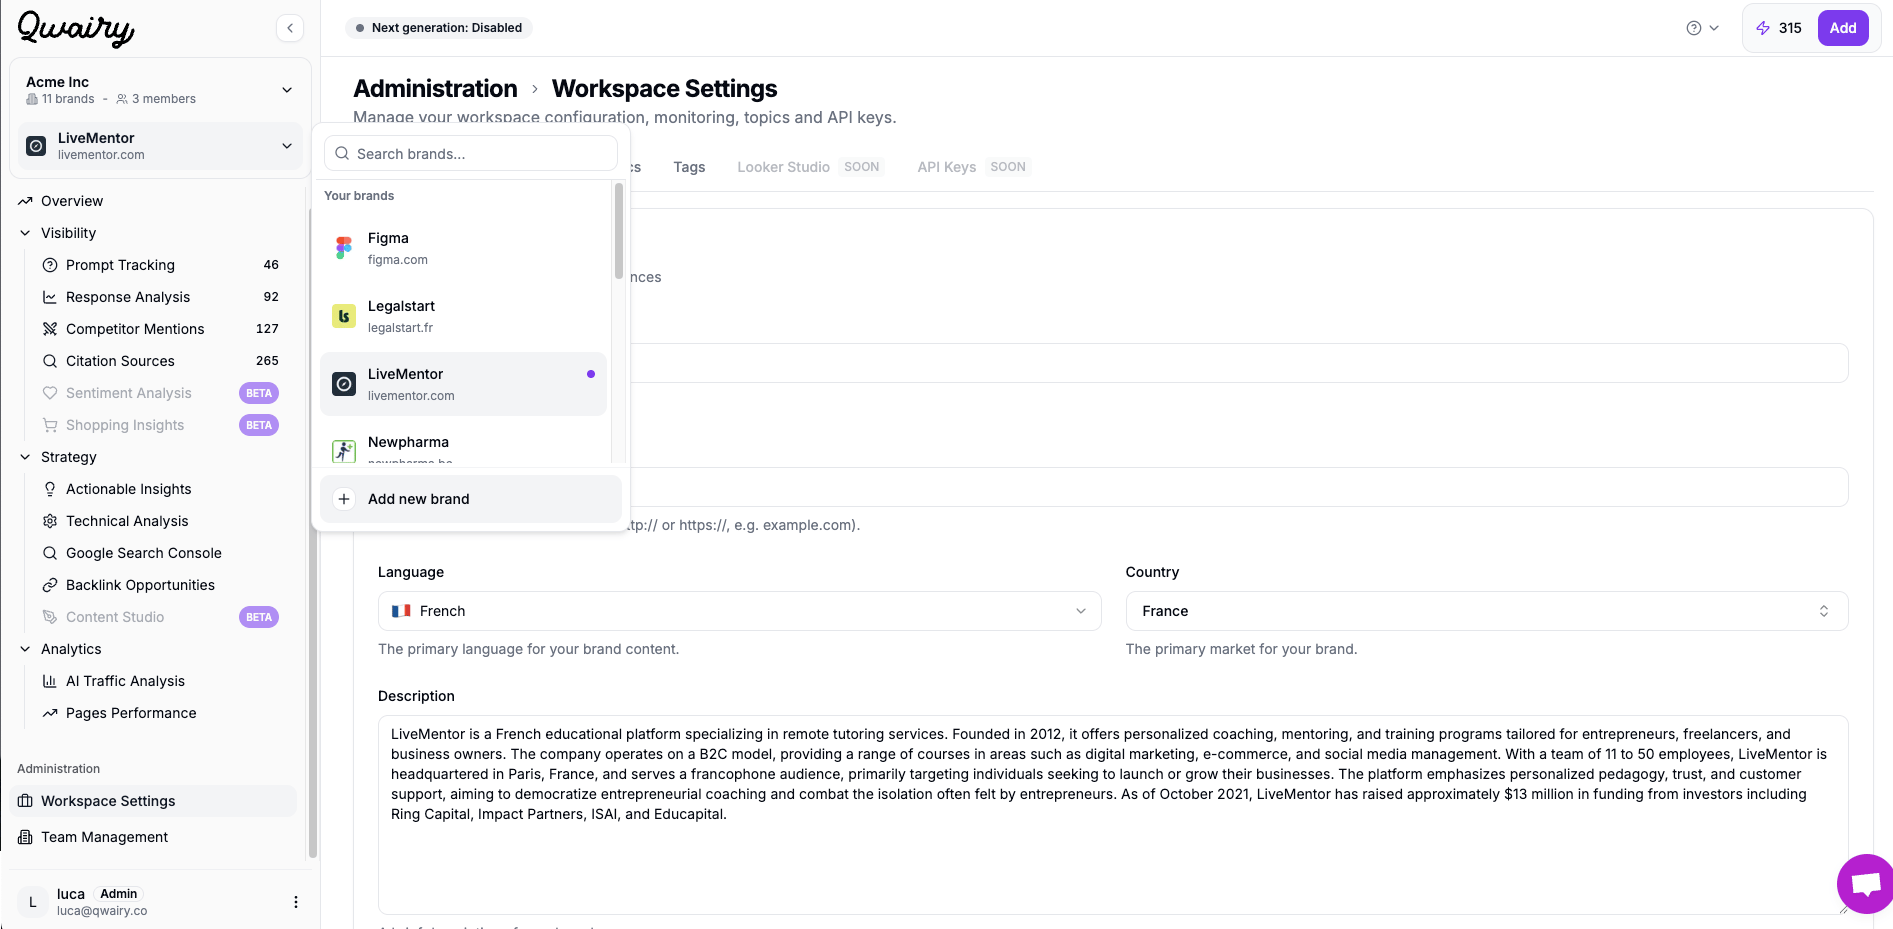 #### 2. Click “➕ Add new brand”
At the bottom of the dropdown list, you’ll see an **“Add new brand”** button. Click it to begin setup.
### What happens next?
You will start your brand onboarding on Qwairy. You can read [this page to understand how to do your onboarding.](/documentation/get-started/quickstart)
You can switch between brands anytime from the dropdown menu.
## Configuration
The **Workspace > Settings > Configuration** section holds workspace-level options that control how Qwairy tracks competitors and pages for this brand.
### Auto-detect competitors
Enabled by default. Qwairy automatically extracts competitors from AI-generated responses: when a model mentions other brands alongside yours, they are added to your competitor list — no manual setup required. New competitors can appear after each monitoring run.
Disable it to manage your competitor list manually. Existing competitors stay tracked; only the automatic discovery of new ones stops. You can re-enable it at any time.
Manage the resulting list in **Monitor > Competitor Mentions** — mark favorites, set a relationship (direct / indirect), or hide irrelevant brands.
### Limit pages to this subdomain
By default, a workspace counts pages and citations across its whole **registrable domain**. A workspace on `blog.example.com` therefore also surfaces pages from `example.com` and any sibling subdomain (`shop.example.com`, `help.example.com`).
Enable **Limit pages to this subdomain** to restrict the workspace to its exact host **and its sub-subdomains**, excluding the parent domain and sibling subdomains.
| Workspace domain | Counted as the workspace's pages | Excluded |
| ------------------ | ---------------------------------------- | ---------------------------------------------------- |
| `blog.example.com` | `blog.example.com`, `*.blog.example.com` | `example.com`, `www.example.com`, `shop.example.com` |
This affects the page-level views: **Page Performance**, the **Pages** list, and **Sources**.
This setting only changes how **pages and sources** are scoped. It does **not** change your brand visibility data (mentions, share of voice, sentiment): those reflect the brand itself, not a specific URL, and stay the same.
Use this when one workspace tracks a content subdomain (e.g. a blog or help center) and you do not want the parent domain's pages mixed in. It has **no effect** for a workspace whose domain is already a root domain.
No. Both settings apply going forward without a re-crawl: page scope changes the page and source views immediately, and competitor auto-detection simply resumes (or stops) on the next monitoring run.
#### 2. Click “➕ Add new brand”
At the bottom of the dropdown list, you’ll see an **“Add new brand”** button. Click it to begin setup.
### What happens next?
You will start your brand onboarding on Qwairy. You can read [this page to understand how to do your onboarding.](/documentation/get-started/quickstart)
You can switch between brands anytime from the dropdown menu.
## Configuration
The **Workspace > Settings > Configuration** section holds workspace-level options that control how Qwairy tracks competitors and pages for this brand.
### Auto-detect competitors
Enabled by default. Qwairy automatically extracts competitors from AI-generated responses: when a model mentions other brands alongside yours, they are added to your competitor list — no manual setup required. New competitors can appear after each monitoring run.
Disable it to manage your competitor list manually. Existing competitors stay tracked; only the automatic discovery of new ones stops. You can re-enable it at any time.
Manage the resulting list in **Monitor > Competitor Mentions** — mark favorites, set a relationship (direct / indirect), or hide irrelevant brands.
### Limit pages to this subdomain
By default, a workspace counts pages and citations across its whole **registrable domain**. A workspace on `blog.example.com` therefore also surfaces pages from `example.com` and any sibling subdomain (`shop.example.com`, `help.example.com`).
Enable **Limit pages to this subdomain** to restrict the workspace to its exact host **and its sub-subdomains**, excluding the parent domain and sibling subdomains.
| Workspace domain | Counted as the workspace's pages | Excluded |
| ------------------ | ---------------------------------------- | ---------------------------------------------------- |
| `blog.example.com` | `blog.example.com`, `*.blog.example.com` | `example.com`, `www.example.com`, `shop.example.com` |
This affects the page-level views: **Page Performance**, the **Pages** list, and **Sources**.
This setting only changes how **pages and sources** are scoped. It does **not** change your brand visibility data (mentions, share of voice, sentiment): those reflect the brand itself, not a specific URL, and stay the same.
Use this when one workspace tracks a content subdomain (e.g. a blog or help center) and you do not want the parent domain's pages mixed in. It has **no effect** for a workspace whose domain is already a root domain.
No. Both settings apply going forward without a re-crawl: page scope changes the page and source views immediately, and competitor auto-detection simply resumes (or stops) on the next monitoring run.